Mobility Aids

Rollators, walkers, canes and crutches from Drive Medical — fitted to keep patients moving safely at home and on the go.

General Help

Click a tab and open the topic you need. Always follow your physician's instructions — these are general references, not medical advice.

Walkers — setting up & fit
  1. Put on the shoes you'll wear while using the walker. Stand up straight, feet close together, shoulders relaxed.
  2. Place the walker in front and partially around you. Hands at your sides.
  3. The tops of the hand grips should be at the crease of your wrists. If not, push the buttons on each leg and slide the tube up or down. Make sure all legs are at the same height and the buttons click back into place.
  4. Take a few practice steps to make sure you can move the walker without bending over.
  5. Check that you have all accessories ordered (basket, seat, etc.). Contact us immediately if anything is missing.
Canes — fit & use
  • Stand with the tip of the cane 4 inches to the outside of your foot.
  • The cane should extend from the floor to your hip joint.
  • When holding the cane, your elbow should bend at a 30° angle.
  • Aluminum canes adjust via the metal button on the shaft. Wooden canes shorten by removing the rubber tip and sawing off excess wood, then replacing the tip.

You may also have accessories such as a hand/wrist strap, cane parker, or snow boot / ice pick tip.

Crutches — fit & use
  • When standing straight, 2-3 fingers should fit between your armpit and the top of the crutch pad.
  • Your elbow should bend 20-30° when your hand is on the grip.
  • Crutches should sit 2-3 inches to the outside of your feet.
  • Weight goes on your hands, not your armpits. Keep elbows in to stabilize.

Climbing stairs with a railing:

  1. Place both crutches under one arm (or one crutch under the arm and the other hand on the railing).
  2. Push on the crutches and step up with the "strong leg." Bring the "weaker leg" up.
  3. Bring the crutches up last.

Descending stairs:

  1. Bring both crutches and feet to the edge of the step.
  2. Lower the crutches to the middle of the next step.
  3. Lower the weaker leg, then step down with the stronger leg.
Wheelchairs — opening, closing, transport
  • To open: place hands on the seat rails and push down with both hands.
  • To close: grab the upholstery at the center front and back of the seat and pull up.
  • To adjust leg rest length: loosen the nut by the foot plate, adjust, and re-tighten. Always do this with the patient's leg in the elevated position.
  • To transport: lock the wheels, remove the foot or leg rests, grab the front of the frame and the rear wheels, and lift carefully.
Walker safety tips
  • Before each use, check that your walker is in an open locked position.
  • Wear shoes that fit well. Avoid flip-flops, slippers, high heels, and slippery soles.
  • Make sure the surface you're walking on is clear, flat, dry, and well lit.
  • Do not step completely into the walker — keep it slightly in front of you at all times.
  • Carry small items in a basket or bag attached to the frame.
  • Look ahead when walking rather than at your feet.
  • Do not use the walker on steps. Keep a safe distance from stairs.
Cane safety tips
  • Be aware of rough or uneven terrain.
  • Watch for throw rugs and wood floors at home — changes in surface can cause slips or balance loss.
  • Make sure your cane is on stable ground before bearing weight.
  • Avoid wet or slippery surfaces when possible.
Crutches safety tips
  • Place weight on your hands, not your armpits — prolonged pressure on the armpits can cause nerve damage.
  • Keep your elbows in to stabilize the crutches.
  • Crutch tips should be in good condition — replace when worn smooth.
  • Check that the height and grip locks are secure before each use.
  • Take stairs slowly. With a railing: crutches under one arm, push up with the strong leg; descending: lower crutches first, then the weaker leg.
  • Make sure the surface is clear, flat, dry, and well lit.
Wheelchair safety tips
  • Never use the wheelchair without foot or leg rests — this can cause circulation problems.
  • Never stand on foot or leg rests.
  • Always lock the wheels when getting in or out.
  • Put the wheelchair against a wall, or have someone steady it from behind, whenever possible.
  • Wheel locks are not brakes — they're parking locks.
  • Use caution on wet, slippery, or uneven surfaces.
  • Do not reach beyond the seat area — you could lose your balance and tip the chair.
  • Never hold onto removable parts when lifting the wheelchair.
Ambulatory aids — getting the best training

A physical therapist, occupational therapist, or physical medicine and rehabilitation provider can offer the best training in the use of all ambulatory aids. Ask your physician for a referral if you'd like a fitting or training session.

How do I clean my wheelchair frame?
  1. Wipe down the frame weekly with a damp cloth and mild soap. Pay extra attention to armrests and push handles, which accumulate skin oils.
  2. Dry the frame thoroughly after cleaning — moisture left in joints can cause rust on steel frames.
  3. Apply a silicone-based lubricant (not WD-40) to wheel axles and folding cross-brace joints every 3 months to keep movement smooth.
  4. Do not submerge the chair or use a pressure washer — this can damage upholstery, wheel bearings, and any electrical components on power chairs.
  5. Inspect the seat upholstery for tears or sagging monthly. A worn seat affects posture and skin safety — call us to arrange replacement.
How do I check and maintain wheelchair tire pressure?
  1. Check pneumatic (air-filled) tire pressure monthly using a standard bicycle tire gauge. Most manual wheelchair tires require 80–100 PSI — check the tire sidewall for your specific model's recommended pressure.
  2. Inflate using a bicycle pump with the correct valve adapter (Schrader or Presta, depending on your chair).
  3. If a tire consistently loses pressure, inspect for punctures. Call our team at (718) 854-5501 to arrange tire replacement.
  4. Solid (flat-free) tires require no inflation but should be inspected monthly for cracks or uneven wear.
Inspect before each use — all mobility equipment
  • Rubber tips (canes / crutches / walkers): Check for wear. Replace when worn smooth — worn tips can slip on all surfaces.
  • Wheelchair wheel locks: Both brakes should engage firmly before each transfer. Test by locking brakes and trying to push the chair.
  • Walker legs: Confirm all legs are locked at equal heights and height-adjustment buttons click fully into place.
  • Rollator brakes: Squeeze both levers and attempt to push — wheels should not move when brakes are fully engaged.
  • If anything feels loose or unsafe, call us at (718) 854-5501 before using the equipment.
How do I check rollator brakes?
  1. Before each use, squeeze both brake levers firmly and try to push the rollator forward — the wheels should not roll when brakes are engaged.
  2. If brakes feel loose or spongy, locate the brake tension adjustment bolt (on the underside of the brake housing on most models) and tighten slightly, then retest.
  3. Check the brake cables monthly for fraying or kinking. Frayed cables must be replaced before use — call our team at (718) 854-5501.
  4. Inspect the brake pads for wear every 3 months. Worn pads reduce stopping power on downhill surfaces.
My wheelchair pulls to one side when I push it. What should I check?
  1. Check tire pressure in both rear wheels — uneven pressure is the most common cause. Inflate both tires to the same PSI per the tire sidewall recommendation.
  2. Check that both brakes are fully released — a partially engaged brake on one side will drag the chair in that direction.
  3. Inspect both rear axles for debris wrapped around them (hair, string, carpet fibers) that can create drag on one side.
  4. If the problem continues, the chair may need a wheel alignment or axle adjustment. Call our team at (718) 854-5501 to schedule a service visit.
My wheelchair has a squeaky wheel. How do I fix it?
  1. Identify which wheel squeaks by pushing the chair and listening. Lift each wheel off the ground and spin it by hand to isolate the sound.
  2. Remove any debris (hair, threads) from around the axle.
  3. Apply a small amount of silicone lubricant to the axle bolt where it meets the wheel hub. Avoid getting lubricant on the tire surface or brake pads.
  4. If the noise comes from the front caster forks, apply lubricant to the caster stem bearing.
  5. If squeaking persists after lubrication, a bearing may be worn. Contact our team at (718) 854-5501 for service.
My rollator brake is not holding. What should I do?
  1. Do not use the rollator for walking or sitting until the brake is fixed — a failed brake is a fall hazard.
  2. Check the brake cable for kinks or visible damage. If the cable is frayed or broken, the rollator must not be used until repaired.
  3. Check the brake tension adjustment — if the cable has stretched, the brake levers may not engage fully. Tighten the adjustment per the rollator's manual or ask our team for guidance.
  4. Call our team at (718) 854-5501 to arrange a service visit. We can adjust or replace brakes and cables.

Our Equipment

Mobility products we deliver, fit, and support.

Walkers, Canes & Crutches
Equipment

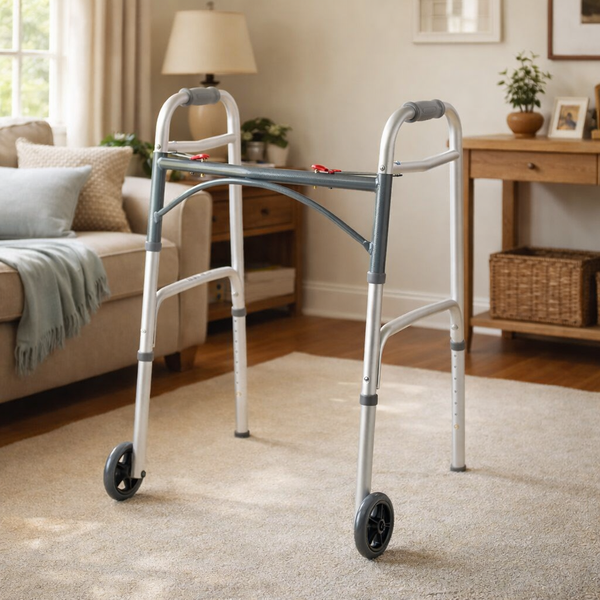
Drive Walker with Wheels (Adult)

Drive Walker with Wheels (Adult)

#10210-4ASM

Folding adult walker with front wheels.
Equipment

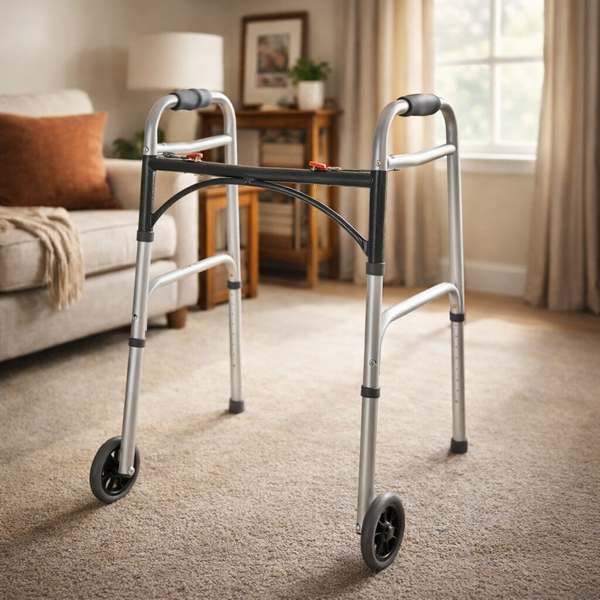
Drive Walker JR

Drive Walker JR

#10201-4 / 10247-4

Junior/petite walker, folding or with wheels.
Equipment

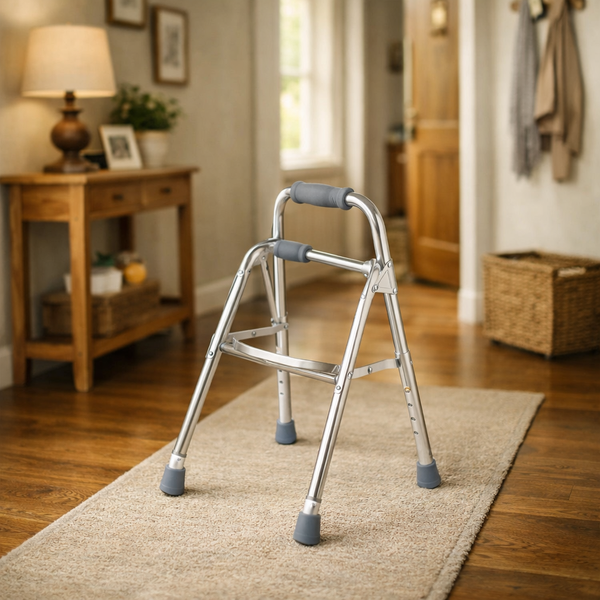
Hemi Side Walker

Hemi Side Walker

#10240-1

One-arm hemi-walker for patients with one-sided weakness (post-stroke, etc.).
Equipment

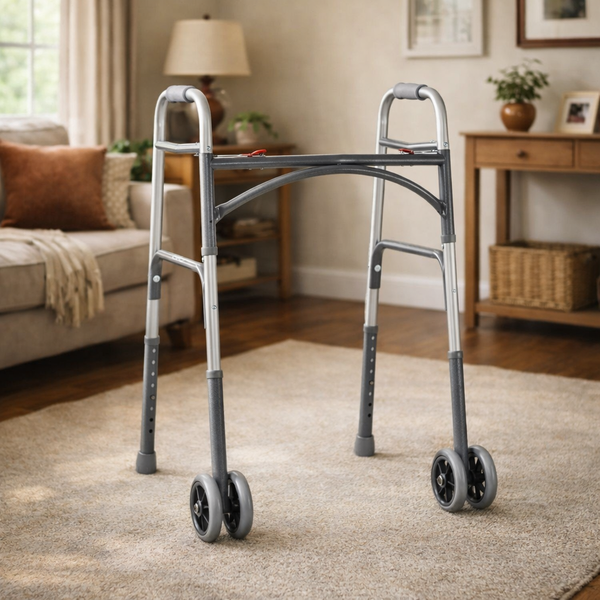
Bariatric Walker with Wheels

Bariatric Walker with Wheels

#10220-1WW

Heavy-duty walker with 5" front wheels — supports patients up to 500 lb.
Equipment

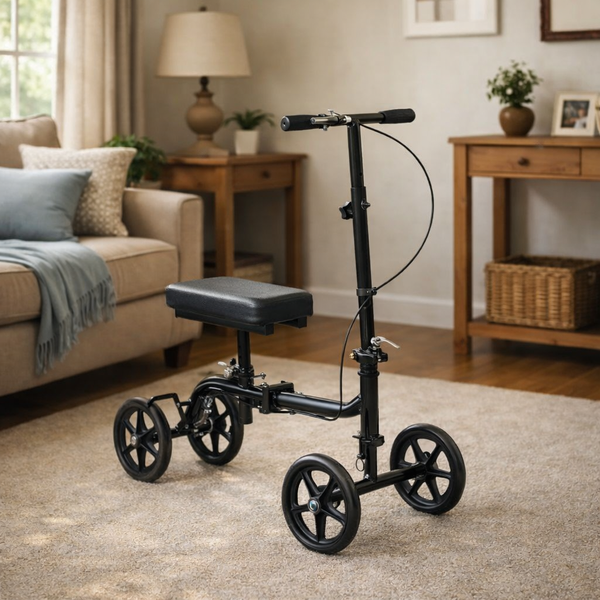
Knee Walker (Eco)

Knee Walker (Eco)

#RTL799

Economy 4-wheel knee walker for foot / ankle recovery.
Equipment

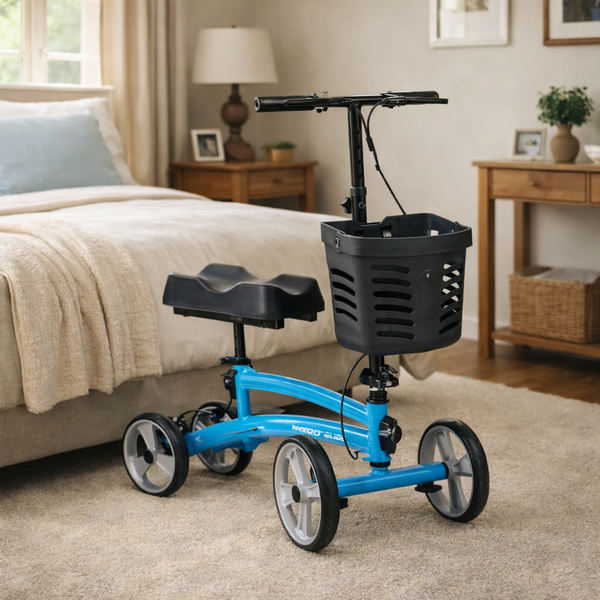
Drive Knee Walker NITRO (Blue)

Drive Knee Walker NITRO (Blue)

#791BL

Premium 4-wheel knee walker for foot/ankle recovery.
Equipment

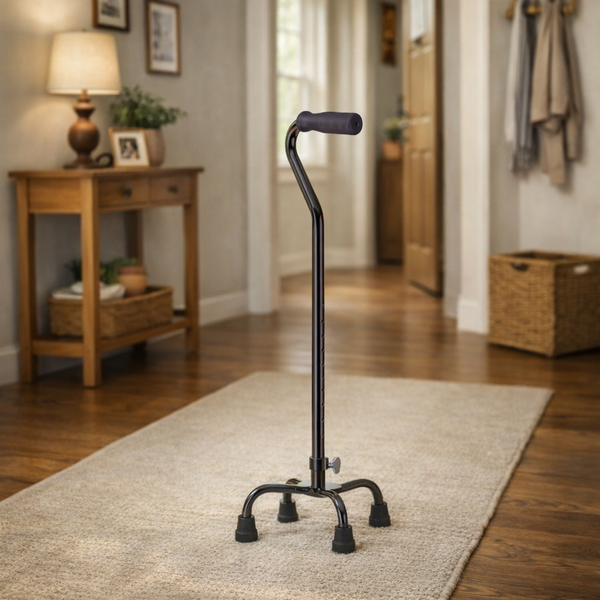
Quad Cane (Small Base)

Quad Cane (Small Base)

#10301-4

Four-point quad cane for added stability.

Equipment

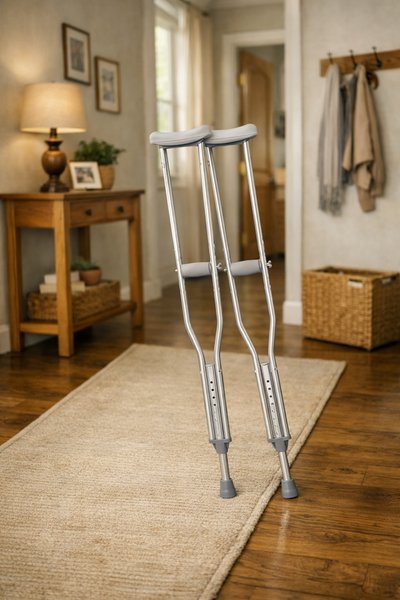
Underarm Crutches

Underarm Crutches (Adult)

#10402-8

Standard aluminum axillary crutches with adjustable height and padded grips and underarm pads. Forearm crutches also available.

Rollators
Equipment

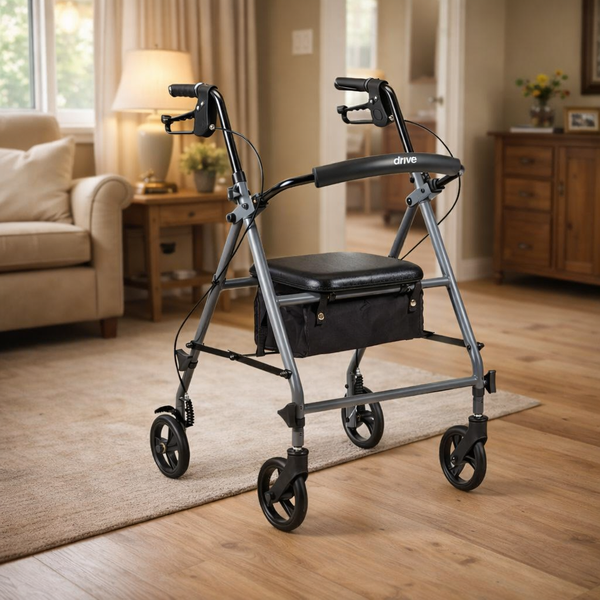
Drive Rollator (Gray)

Drive Rollator (Gray)

#R800KD-GY

Folding 4-wheel rollator with seat, basket, and brakes. Supports up to 350 lb.
Equipment

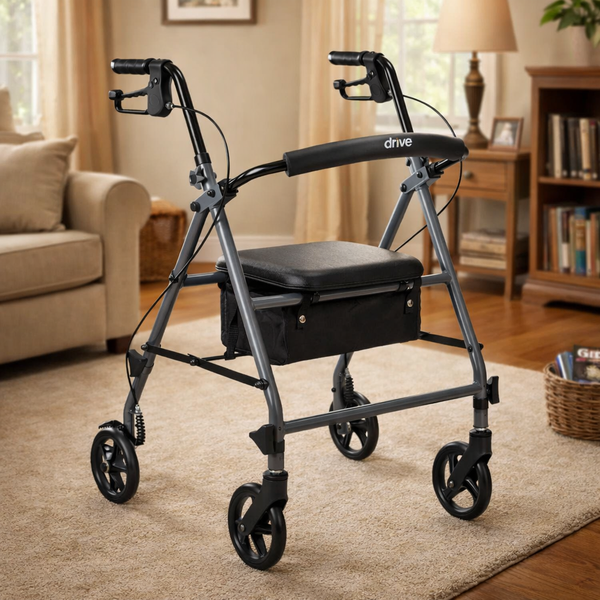
Bariatric Rollator

Bariatric Rollator

#10215BL-1

Heavy-duty wide-frame rollator for larger users.

Drive Rollator (Gray) — Help & FAQ

How do I use this rollator?
Adjust handle height so your elbows have a slight bend while gripping — handles should be at wrist crease level. Walk upright inside the frame; do not lean heavily forward onto the handles, as this shifts your center of gravity and raises fall risk. The hand brakes slow or stop the rollator when squeezed — squeeze and hold before sitting on the seat to lock the rollator in place. The padded seat is for short rest breaks only, not extended sitting. To fold for transport: lift the seat or use the fold lever, then collapse the frame inward.
How do I clean and maintain it?
Wipe the frame, seat, and handles with a damp cloth and mild soap. Check brake cables and pads monthly — brakes should engage firmly. Inspect wheels for hair or debris and clean as needed. Tighten any loose screws or bolts. Test brakes before each use by squeezing and verifying the wheels stop.
What if brakes feel weak or the seat is unstable?
Never sit on the rollator if the brakes do not hold securely — the unit can roll and cause a fall. If brake cables are frayed or pads are worn, stop use and call our team at (718) 854-5501 for service.

Bariatric Rollator — Help & FAQ

How do I use this rollator?
This heavy-duty rollator has a reinforced frame and wider seat to accommodate higher weight capacities — confirm the rated limit on the frame label before use. Adjust handle height to wrist crease level with a slight elbow bend. Walk upright; do not lean forward onto the handles. Squeeze and hold both hand brakes before sitting on the seat to prevent rolling. The seat is for short rest breaks only. To fold: lift the seat or use the fold release and collapse the frame inward.
How do I clean and maintain it?
Wipe the frame, reinforced seat, and handles with a damp cloth and mild soap. Check brake cables and pads monthly. Inspect the wider wheel set for debris. Tighten bolts and fasteners regularly. Test brakes before each use — do not sit on the seat unless brakes hold firmly.
What if brakes feel weak or the seat is unstable?
Do not sit on the rollator if brakes don't hold. Never exceed the rated weight capacity. For brake service or a replacement, call our team at (718) 854-5501.

Drive Walker with Wheels (Adult) — Help & FAQ

How do I adjust and use this walker?
To set the correct height: stand upright in your walking shoes, let your arms hang naturally, and adjust the walker legs so the handles are level with your wrist crease. Your elbows should have a slight bend when gripping the handles. Push the button on each leg, slide to the desired hole, and confirm it snaps fully locked — check all four legs. To walk: push the walker slightly ahead, step forward with your weaker leg, then bring the stronger leg to meet it. Keep all four tips or wheels on the ground before putting weight on the walker. Take small, controlled steps — do not rush.
How do I clean it?
Wipe the frame and handles with a damp cloth and mild soap as needed. Check the front wheels and rear rubber tips after each outing — remove any debris or pebbles caught in the wheels. Inspect rubber tips regularly and replace them when worn, cracked, or no longer grippy; worn tips are a fall hazard. Dry the walker thoroughly before storing to prevent rust on the frame joints.
What if it feels unstable?
Confirm all four leg height buttons are fully snapped into the adjustment holes and all legs are set to the same height. If the walker wobbles or a leg slides in, the button may be worn — stop use and call our team at (718) 854-5501 for a replacement. Never use a walker with a loose leg or missing rubber tip.

Drive Walker JR — Help & FAQ

How do I adjust and use this walker?
The Walker JR is a compact-frame walker designed for shorter adults. Adjust height the same way as a standard walker: stand upright in walking shoes, let arms hang naturally, and set handle height to wrist crease level — elbows should have a slight bend. Press each leg button, slide to the correct hole, and confirm all four snap fully locked at equal height. To walk: advance the walker slightly ahead, step forward with your weaker leg first, then bring the stronger leg forward. Keep all four tips on the ground before bearing weight.
How do I clean it?
Wipe the frame and handles with a damp cloth and mild soap. Check rubber tips after each use and replace them when worn or cracked — worn tips reduce traction significantly. Dry thoroughly before storage to protect frame joints from rust.
What if it feels unstable?
Verify all four leg buttons are fully engaged and legs are set to identical heights. If any leg slides or the frame wobbles, stop use immediately and call our team at (718) 854-5501.

Drive Knee Walker NITRO (Blue) — Help & FAQ

How do I adjust and use this knee walker?
The NITRO knee walker keeps full weight off an injured foot or ankle while you recover. Adjust the knee pad height so your injured knee rests with your lower leg roughly vertical; set handlebars at waist height. Lock the hand brakes before mounting. Rest the injured knee on the pad, grip the handlebars, and push forward with your healthy foot. Slow to a crawl before steering — turning at speed can tip the scooter. Always engage the brakes before getting on or off, and on inclines or uneven surfaces.
How do I clean it?
Wipe the frame, knee pad, and handlebars with a damp cloth and mild soap after each outing. Tighten all adjustment knobs before each use. Inspect brake cables and brake pads regularly — brakes should hold firmly. Clear debris and hair from the wheels to maintain smooth rolling.
What if brakes feel weak or it won't stay adjusted?
If adjustment knobs slip, fully tighten them. Spongy or ineffective brakes are a safety hazard — do not use the scooter until brakes are serviced. Call our team at (718) 854-5501 for inspection or a replacement part.

Quad Cane (Small Base) — Help & FAQ

How do I adjust and use this cane?
Hold the quad cane on your stronger side (opposite the weaker leg). Adjust height so the handle is at wrist crease level when standing upright with a slight elbow bend — press the button, slide to the correct hole, and confirm it snaps locked. To walk: move the cane forward at the same time as your weaker leg, then advance your stronger leg. All four rubber tips must contact the floor flat before you bear weight. On stairs, lead with your stronger leg going up and your weaker leg going down ("up with the good, down with the bad").
How do I clean it?
Wipe the shaft and handle with a damp cloth. Inspect all four rubber tips for wear or cracking and replace them when needed — worn tips reduce stability on smooth floors. Confirm the height button is fully engaged before each use.
What if it feels wobbly?
Check that the height button is fully locked and all four tips are intact and level on the floor. A bent base or cracked tip reduces stability significantly. Call our team at (718) 854-5501 if any structural part is damaged.

Underarm Crutches — Help & FAQ

How do I fit and use crutches?
Proper fit is critical: the underarm pad should sit about 1–2 inches (two finger-widths) below your armpit — never rest your full weight on the pads, as this can damage the nerves in your armpit. The handgrip should be at wrist crease level with a slight elbow bend. To walk: place both crutches about one step ahead, swing your body forward between them, and land on your good foot. Keep your injured leg off the ground per your doctor's instructions. On stairs: hold both crutches under one arm and use the rail with the other, or use one crutch per arm and step up with the good leg first, down with the crutches first.
How do I clean them?
Wipe the shafts, handgrips, and underarm pads with a damp cloth and mild soap. Check the rubber tips on the bottoms after every outing — remove debris and replace tips when they are worn smooth. Confirm all wing nuts and height buttons are tight before each use.
What if they slip or feel loose?
Slipping tips are the most common cause of crutch falls — replace immediately if the tips are worn or missing. If height buttons or wing nuts won't hold, stop use and call our team at (718) 854-5501 for a replacement pair.

Hemi Side Walker — Help & FAQ

How do I adjust and use this walker?
The hemi (side) walker is designed for one-handed use — ideal for patients with weakness or paralysis on one side from stroke, injury, or surgery. Hold it with your stronger arm. The curved side faces outward (away from your body) and the flat side faces inward (toward your affected leg) to prevent tripping. Adjust height so the handle is at wrist crease level with your elbow slightly bent. To walk: advance the walker, step forward with the weaker leg, then bring the stronger leg forward. Keep all four tips on the ground before putting weight through it.
How do I clean it?
Wipe the frame and handle with a damp cloth and mild soap. Inspect all four rubber tips after use and replace when worn or cracked. Confirm all height adjustment buttons are fully snapped before each use.
What if it feels unstable?
Check that all four leg buttons are locked at equal heights. If the walker tips to one side or a leg slides, stop use immediately. Call our team at (718) 854-5501 for a service check or replacement.

Bariatric Walker with Wheels — Help & FAQ

How do I adjust and use this walker?
This heavy-duty walker has a reinforced frame with a higher weight capacity than a standard walker — confirm the rated weight limit on the frame label before use. Adjust height so the handles sit at wrist crease level when standing upright with a slight elbow bend; press each leg button, slide to the correct hole, and confirm all four snap fully locked at equal height. To walk: advance the walker slightly ahead, step forward with the weaker leg, then bring the stronger leg forward. Keep all four tips or wheels on the ground before bearing weight.
How do I clean it?
Wipe the wider frame and handles with a damp cloth and mild soap. Check all four rubber tips and front wheels for debris and wear after each use — replace tips when worn. Dry the frame joints thoroughly to prevent rust.
What if it feels unstable?
Verify all leg buttons are fully snapped at equal heights. Never exceed the weight rating printed on the frame. If any leg slides or the frame bends, stop use and call our team at (718) 854-5501.

Knee Walker (Eco) — Help & FAQ

How do I adjust and use this knee walker?
A knee walker lets you rest your injured leg on the padded platform while propelling yourself with your healthy leg — keeping weight completely off the injured foot or ankle. To set up: adjust the knee pad height so your injured knee rests comfortably on the pad with your lower leg roughly vertical; adjust handlebars to waist height. Before mounting, lock the hand brakes. Rest the injured knee on the pad, grip the handlebars, and push forward with your good foot. To turn, slow to a very low speed before steering — turning too fast can tip the walker. Always lock brakes before getting on or off.
How do I clean it?
Wipe the frame, knee pad, and handlebars with a damp cloth and mild soap after each use. Check that all adjustment knobs and bolts are tight before each ride. Inspect brake cables periodically — brakes should engage firmly with a comfortable squeeze. Clean wheels of debris and hair.
What if it feels unstable or brakes feel weak?
If the knee pad or handlebars slip after adjustment, tighten the locking knobs fully. If brakes feel spongy or don't hold, stop use — worn brake pads or a loose cable are a safety hazard. Call our team at (718) 854-5501 for service or a replacement.

Need Help?

For a medical emergency please dial 911.
For equipment questions our team is here Mon–Fri 9 AM – 5 PM.

Contact Our Team   (718) 854-5501